
TECHNOLOGY
3D Printing Website & 5 Axis CNC Wood Carving Machine Price in India

Introduction
Websites for 3D printing are platforms where users design, personalize, and buy 3D objects by additive manufacturing. From a hobbyist to a manufacturer to an engineer, it facilitates the complete transformation of ideas into physical products owing to ease.
From uploading CAD files to selecting materials and finishes, a 3D printing website generally simplifies the process by hurling convenience along with accuracy and speed.
Key Features of a Professional 3D Printing Website
A good website for 3D printing will not just serve as a portal for ordering but rather enhance the overall user experience.
What Makes a 3D Printing Website Distinctive?
This is the section where the essential aspects found in a top-standing 3D print platform are dissected.
1. User-Friendly Interface
This platform can be accessed by each and every one—from beginners to experts—with ease, navigation making it easy to quickly upload files and step-by-step instructions.
2. Instant Quote Generator
Users upload their design files (STL, OBJ, etc.) to get instant pricing based solely on size, material, and complexity attributes.
3. Material and Finish Options
Webs where you can find the widest variety of plastics, metals, resins, and finishes to meet your functional and aesthetic needs.
4. 3D Preview and File Analysis
Built-in tools that allow users to 3D preview their part and recognize errors before moving into production can save time and cost.
5. Tracking Orders and Giving and Receiving Help
Access by customers to information tracking the production and expected time of delivery and provision of expert assistance whenever needed.
The Importance of Online 3D Printing Services
Online 3D printing provides speed and flexibility, guaranteeing that users anywhere around the globe can innovate without the need for personally owned machinery.
These are some of the reasons that make the people of the world visit various 3D printing websites:
- Fast Prototyping: The turnaround times are short, allowing businesses to test, iterate, and improve the products over days rather than weeks.
- Down to earth: there is no expensive tooling or molds to be found with custom and small-run production.
- Broad-reaching: You can access the top-notch 3D printing services by only having been connected to the internet and furnished with a design file.
- Uniqueness: Each printing can be different, offering a myriad of possibilities to be personalized and processed on demand.
- Scalable Solutions: From 1 to 10,000 parts, most sites can accommodate the demand.
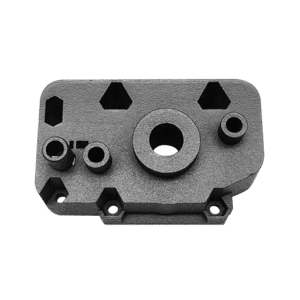
5 Axis CNC Wood Carving Machine Price in India

Average Price Range:
- Entry-Level: ₹800,000 to ₹1,500,000
- (Suitable for small workshops or enterprises dealing with signage and simple decorative items.)
- Mid-Range: ₹15,00,000 to ₹25,00,000
- (Useful for medium-sized furniture manufacturers or precision artisans.)
- High-End Industrial: ₹25,00,000 to ₹50,00,000+
- (Used in large-scale manufacturing, with high-speed continuous operation and detailed craftwork.)
Pricing is also determined by the following factors:
- Quality of Material and Build: Machines made with better materials and stronger frames will command higher prices but will last longer.
- Spindle Power & Speed: More powerful motors facilitate quick and impeccably clean cuts, particularly for hardwood.
- Controller Setup: Touchscreen-based CNC with advanced automation can take the price up.
- Compatible Software: Those capable of working with higher-grade CAD/CAM can afford much more design freedom.
- After-Sale Services & Guarantees: Generally, the cost of the machine is higher with manufacturers of repute that provide all training nationwide.
In India, the most powerful brands today are AccTek, IGOLDENCNC, Biesse, and HOMAG, which customize models to suit varying budgets and scales of operation.
Conclusion
Digital manufacturing transforms all designing and building processes in the world. It is as if someone woke up to discover that, with just a click, 3D-printed sites now allow digital models to be converted into actual objects within seconds, accurately and creatively. A New Yorker designer or a student in Delhi now has access to powerful tools without much investment.
Simultaneously, the CNC 5-axis machine, a wood-carving machine, has proven to be a revolution in the machinery world in India. This machine brings untouched detail, speed, and scale into everything that could possibly go from custom furniture to artistic installations.
FAQs:
1. What are the features on a website for 3D printing?
Such a 3D printing site enables uploading a 3D design file, selecting a material, receiving an instant quote, and ordering the printing of custom parts or prototypes. This is a very fast, user-friendly, anywhere-accessible interface.
2. 5 axis CNC wood Carving Machines price in India?
The price of 5-axis CNC wood carving machines varies in India from a little over 800,000 to even 5,000,000, depending on its configuration, build quality, and brand.
3. Who should invest in a 5-axis CNC wood carving machine?
Furniture manufacturers, woodcraft artisans, and manufacturers who need detailed or beautifully curved wood designs benefit the most. It is best suited for businesses that need speed, precision, and complexity in their designs.

The tech world is constantly evolving, and staying informed has never been more critical. Whether you’re a gadget enthusiast, a casual browser hunting for tips, or a professional trying to keep up with industry trends, TechStudify.com simplifies technology for everyone. It has positioned itself as a premier hub for tech enthusiasts and lifelong learners. But why should you make it your one-stop shop for technology education?
This blog explores the standout features, wealth of resources, and reasons why TechStudify.com deserves to be bookmarked in your browser.
Your Digital Guide to Technology Unlocked
At its core, TechStudify.com is all about making complicated tech jargon and concepts accessible to everyone. Whether you’re exploring the best ways to use AI tools, looking for ways to optimize your devices, or staying ahead in gaming and gadgets, TechStudify marries expertise with simplicity. Its mission is to empower users with practical, informed, and actionable content.
Designed to cater to curious minds at all levels, TechStudify breaks down the barriers that often make technology seem daunting. With a seamless combination of up-to-date news and in-depth guides, it offers readers the knowledge they need to get their tech game on point.
Comprehensive Content That Educates and Engages
1. Wide-Ranging Topics
TechStudify covers a broad spectrum of technology areas. Whether you’re interested in the latest AI innovations, gaming, securing your digital devices, or maintenance tips for your gadgets, there’s something for everyone. Here’s a glimpse of some featured categories:
- AI Innovations – Stay updated on how tools like Google Gemini 2.0 are redefining the digital landscape.
- Device Optimization – Get tips on optimizing your phone’s battery or preventing burnout on OLED screens.
- Gaming Guides – Explore expert insights on graphic settings or upcoming launches like GTA 6.
- Home Technology – Wondering if robot vacuums are worth it? Or how to detect scams online? TechStudify has the answers.
Tech learners with niche cravings (like abandonware enthusiasts) will also find dedicated guides that revive classic software and explore tech history.
2. Expert Curation Meets Readability
Unlike technical sites that overwhelm readers, TechStudify crafts content with clarity and purpose. Its approachable writing style ensures readers of any background can make sense of complex ideas. Additionally, the content is curated by experts with hands-on industry expertise, offering reliable and practical advice.
For example:
- “Optimal Charging Tips to Extend Your Phone Battery Life” demystifies phone settings configuration with easy-to-follow steps.
- “Unlocking the Full Potential of ChatGPT Free Plan” helps readers without spending extra on premium AI tools.
3. Visual and Interactive Learning
TechStudify understands that engaging visual aids complement great content. Eye-catching infographics, image-rich tutorials, and embedded videos simplify learning for readers who prefer visuals over plain text. The modern, user-friendly site layout ensures easy navigation, helping readers quickly find what they’re looking for.
4. Insights with a Practical Edge
TechStudify’s hallmark is its focus on applied knowledge. Everything shared—from detecting scams using emerging AI tools to step-by-step guides for device care—is tailored to enrich users’ digital lives. Readers leave not just with tech-savvy skills, but with immediate, actionable solutions.
Why Choose TechStudify Over Other Resources?
1. Timely Updates on Emerging Trends
Technology never sleeps, and neither does TechStudify. The blog ensures you’re always informed about the breakthroughs shaping the future. From the rollout of Google’s new AI-driven tools to reviews of upcoming hardware (e.g., RTX 5000 series), you’re guaranteed real-time insights into trending topics.
Whether it’s answering burning questions like “Should you wait for the next generation GPUs?” or outlining best practices to secure your online accounts, TechStudify acts as the pulse of modern tech discussions.
2. Trusted Recommendations
Unlike overcrowded forums or generic product reviews, TechStudify vets every feature, tool, and tip based on user experience and technical reliability. Their reviews are backed by industry-insider expertise, ensuring that every word is grounded in credibility.
For instance:
- Should you consider a robot vacuum? Their “Worth It or Gimmick?” article examines their limitations alongside potential benefits.
- They don’t stop at theory. Expect hands-on recommendations with insightful instructions.
3. Community-Centric Focus
TechStudify is more than a resource platform; it’s a hub for tech lovers to connect, exchange ideas, and move forward together. Whether you want to share opinions on hot-button topics like abandonware legality or join a debate about AI ethics, this space nurtures collaborative dialogue.
Beyond just knowledge transfer, TechStudify brings enthusiasts closer to a broadly connected global tech community.
How TechStudify Can Add Value to Your Journey
On top of educating readers, this platform acts as a guide and companion for both routine users and advanced learners:
- Find Simple Fixes for Everyday Challenges
From preventing screen burns to extending battery lifetimes, mundane tech issues are addressed comprehensively.
- Level-Up Professional Prowess
Leverage insights from TechStudify to build practical skills, whether maximizing tools like ChatGPT or tweaking work-from-home setups using optimal devices.
- Enhance Your Hobbies
Are you a gamer hoping to boost system performance? Or perhaps someone curious about AI-powered scam detectors? TechStudify balances being educational with delivering directly applicable fun.
Learning Begins Here – Get Started with TechStudify
Whether you’re just beginning to explore technology or are a seasoned pro looking to enhance your knowledge, TechStudify.com is your go-to digital partner. It combines expert-driven insights, accessible language, and relevance to build a learning experience that truly resonates.
If you’re ready to solve your daily tech needs, uncover hidden nuggets of tech wisdom, and make smarter decisions with devices, bookmark TechStudify.com today. Knowledge isn’t just empowering; it’s meant to revolutionize the way you interact with the world around you. Turn the complex into comprehendible, and start mastering the tech universe, one click at a time.

Many websites and applications do not work properly on all devices, leading to issues like distorted layouts, broken functionality, and poor performance. A website that looks fine on a desktop may become difficult to navigate on a mobile screen due to misalignment or slow loading times. Responsive testing helps solve this problem by checking how applications perform across different devices, screen sizes, and browsers.
A responsive checker helps run mobile-friendly tests and identify layout issues and confirm that the design adapts correctly to various screen resolutions. In this article, we will explore different cross-device testing methods, challenges, and best practices to improve application performance across multiple platforms.
What Is Responsive Testing?
Responsive website testing checks whether a website displays and functions correctly across different screen sizes and devices. It typically uses CSS media queries to adjust the layout based on the device accessing the site.
In simple terms, this testing helps verify that your website looks and works as expected on desktops, tablets, and smartphones. A site that adapts well to all resolutions creates a better user experience and gives your business a competitive edge.
Responsive testing is usually part of the final phase of a responsive web design project. It’s closely tied to cross-browser testing, since both aim to improve how a website looks and behaves under different conditions. The main difference is that responsive testing checks adaptability across screen sizes, while cross-browser testing focuses on browser-specific behavior.
Why is Cross-Device Testing Required?
Cross-device testing is important because users access applications from many types of devices and operating systems. Differences in screen sizes, resolutions, and OS versions affect how an application works. Testing on multiple devices helps confirm that users do not face issues while using the application.
According to Statista, in December 2022, smartphones made up 77% of mobile device sales, followed by tablets at 11.5% and smart wearables at 8.1%. This highlights the need to test applications on different device types.
Operating system differences also impact how an application functions. iOS users may experience different features or bugs compared to Android users. Statista reported that in the last quarter of 2023, Android had a 70.1% market share, while iOS had 29.2%. This shows why testing applications on both platforms is important to confirm proper functionality for all users.
How Do You Choose What Devices to Test On?
With many devices, screen sizes, and operating systems available, it is important to decide which configurations to test. Testing on every device is not possible, so the focus should be on selecting a diverse range of options that match the user base while staying within time and budget limits.
The selection of devices depends on the project requirements. In some cases, testing may be done on a single device with a specific OS and screen size. This approach is useful when an application is designed for a particular device.
Popular web analytics tools can help identify commonly used devices and operating systems. These tools provide real-time data on OS market share and screen sizes. If user analytics are available, they can help refine testing choices by focusing on the most relevant configurations.
Approaches to Perform Cross-Device Testing
Testers can use two methods for cross-device testing:
- Manual Cross-Device Testing
- Automated Cross-Device Testing
These approaches help confirm that mobile applications work properly on different devices.
Manual Cross-Device Testing
Manual testing requires testers to interact with an application like an end-user. They check usability, performance, and functionality across various devices to find issues.
Steps for Manual Cross-Device Testing
- Select Devices: Pick devices that reflect your target audience. Cover a range of screen sizes, operating systems, and resolutions. Include both older and newer models to catch layout issues and compatibility problems.
- Test Planning: Create a test plan with test cases for each selected device. Prioritize important functionalities and commonly used devices to speed up testing.
- Test Execution: Testers check the user interface, navigation, and responsiveness. They evaluate the application under different network conditions like 5G, 4G, 3G, and Wi-Fi. They also test in both portrait and landscape modes. Regression testing is performed to confirm that updates do not affect functionality.
- Documentation: Any issues found are recorded, and detailed feedback is shared with the development team.
Limitations of Manual Cross-Device Testing
- Works well for a small number of devices but becomes expensive and time-consuming for large-scale testing.
- Human errors may lead to missed issues or incorrect test execution.
- Testing consistency may vary since different testers may follow different methods.
To overcome these challenges, automated testing can be used.
Automated Cross-Device Testing
Automated testing uses tools and frameworks to test applications on multiple devices. It speeds up testing and reduces manual effort.
Steps for Automated Cross-Device Testing
- Define Test Scenarios and Requirements: Start by identifying the devices and screen sizes you want to cover. List the test scenarios for each; these could include layout checks, navigation behavior, or functional flows like form submissions.
- Choose Automation Tools: Pick tools that match your project needs and support the target devices and browsers. Selenium, Appium, or tools like LambdaTest are common choices for cross-device testing.
- Create Test Scripts: Write scripts that can be reused across platforms. Keep them modular so they handle variations in UI behavior across screen sizes or operating systems. Consider writing tests in a framework that supports parallel execution to speed things up.
- Implement Parallel Testing: Run tests on multiple devices at the same time to speed up the process.
- Set Up Continuous Integration (CI): Integrate testing with CI/CD pipelines to automate tests with every code change.
- Monitor Test Execution: Track test results to identify and fix failures.
- Update Test Scripts Regularly: Modify scripts to match software updates and new device configurations.
Where to Run Cross-Device Tests?
Different testing methods help confirm that applications work properly across various devices. Below are the main options for running cross-device tests:
Physical Devices
Physical devices are actual smartphones and tablets used for testing instead of virtual versions. They cover different screen sizes, operating systems, and hardware configurations, including folding phones and wearables.
This method is useful for testing features like cameras, sensors, GPS, facial recognition, and motion detection. Testing on real devices helps find usability issues under real-world conditions. However, using physical devices for minor checks, such as verifying if an app launches correctly, may not be practical. It can also be expensive and time-consuming, especially for businesses with limited resources.
Real Device Cloud
A real device cloud provides access to Android and iOS devices over the internet. This method allows testers to run applications on real hardware without maintaining an in-house device lab.
Setting up and updating physical devices requires ongoing investment, but cloud-based services manage these tasks. Real device cloud testing supports features like biometric authentication, camera functions, Bluetooth, and sensors. It helps teams test applications without needing to buy and maintain a large collection of devices.
Emulators and Simulators
Emulators and simulators create virtual environments for testing applications. They provide a cost-effective way to check basic functionality without needing real devices.
While both serve a similar purpose, they have differences. Emulators mimic the entire hardware and software of a device, while simulators focus on software behavior. These tools help with early-stage testing and are easy to set up. They also work well in Continuous Integration (CI) environments for automated testing.
However, emulators and simulators cannot fully replicate real-world conditions. They may not support features like biometric authentication, physical sensors, or performance testing under network fluctuations. For tests requiring real user interactions, physical devices or cloud-based testing is a better choice.
Each method has its advantages and limitations, and choosing the right approach depends on the testing needs, available resources, and project requirements.
Cross-Device Testing Strategies
To effectively perform cross-device testing, effective strategies should be followed. Next, let’s look at some key strategies that can be used for cross-browser and device testing.
- Planning and Analysis: Start by identifying the target devices, operating systems, and browsers used by the customers through research and analytics. Create device matrices to prioritize testing based on usage data to confirm comprehensive coverage across different device types.
- Responsive and Adaptive Design Testing: Implement responsive design principles to make sure the application adapts to different screen sizes and orientations. Test adaptive features to confirm that different layouts and functionalities are correctly displayed and function across all targeted devices.
- Visual and Interface Testing: Conduct thorough visual testing to verify that UI elements, layouts, images, and text display correctly across all devices. Test the application’s interface usability to confirm a good user experience, especially on devices with smaller screens.
- Functional Testing Across Devices: Validate cross-platform consistency by testing all functionalities across different devices. This includes assessing how the application handles user inputs, processes data, and maintains feature accessibility across various platforms and devices.
- Performance Testing: Check load times, responsiveness, and system resource usage across multiple devices. Track CPU, memory, and battery consumption to spot performance issues that might not be visible through UI alone.
- Security Testing Across Platforms: Verify that data is handled securely during transmission and storage on all target devices. Test login flows, session handling, and permission checks to confirm that user data stays protected across platforms.
- Test Automation: Automate repetitive tests using tools to execute tests consistently across different devices and platforms. Integrate automated tests into a CI/CD pipeline to continuously verify application functionality as new code is deployed.
Challenges of Cross-Device Testing
Cross-device and browser testing comes with several challenges, including:
- Testing across many devices and screen resolutions requires a large inventory, which can be expensive and difficult to manage.
- Web applications must work on different browsers and versions, but frequent updates make it challenging to keep tests up to date.
- Variations in processing power, memory, and display quality affect how applications perform. This makes it harder to test speed and responsiveness across devices.
- Some devices support gestures or navigation methods that others do not. Testing for multiple input types adds complexity to the process.
- Automated tests must cover multiple device scenarios, which requires setting up and managing different test environments. This increases the effort needed to maintain test scripts.
- Creating and maintaining the necessary systems for cross-device testing requires significant investment in both infrastructure and resources.
Best Practices for Cross-Device Testing
Following best practices helps improve the accuracy and effectiveness of cross-device testing.
- Use tools like Google Analytics and user surveys to find out which devices and screen sizes are most popular among users. Focus testing on these configurations.
- Create a test plan that covers the most important features and operating systems. Testing critical functionalities first helps identify major issues early.
- Use emulators and simulators for early-stage testing, but always verify on real devices. This helps confirm how the application behaves in real-world conditions.
- Test on older devices and operating systems to check compatibility for users who have not upgraded. This helps maintain a smooth experience for all users.
- Run tests on Wi-Fi, mobile data, and slower networks to check how the application performs under varying conditions. This helps find connectivity-related issues.
- Collect feedback from real users to check if the application is not only functional but also easy to use. User insights help refine the overall experience.
Tools for Cross-Device Testing
Cross-device testing tools help testers make sure their applications work smoothly across different devices. Here are the top 6 tools,
- LambdaTest: It is an AI-native test orchestration and execution platform. It helps you perform manual and automation testing on over 5000+ real desktop browsers, devices, and operating system combinations.
- Appium: Appium is an open-source automation tool for testing Android and iOS applications. It supports hybrid apps and helps automate functional testing to check if an application performs as expected.
- Espresso: Espresso is a testing framework developed by Google for Android applications. It provides tools for writing UI tests that check interactions, layout, and responsiveness. It includes APIs like ViewMatchers and ViewActions to simulate user interactions.
- XCUITest: XCUITest is a testing framework developed by Apple for testing iOS applications. It allows developers to create automated tests in Swift or Objective-C to verify app functionality on iPhones and iPads.
- Robotium: Robotium is an open-source testing tool for Android applications. It helps create test cases for different scenarios, such as checking how an app responds under various conditions and whether it meets functional requirements.
When it comes to automating mobile web applications, Selenium mobile testing is a popular choice. It leverages the powerful Selenium framework, which is typically used for web applications, to test mobile browsers on real devices or emulators.
Selenium mobile testing refers to using the Selenium framework to automate testing for mobile web applications. While Selenium is primarily designed for web application testing, it can be extended to mobile testing through Selenium WebDriver with mobile browsers on real devices or emulators.
Conclusion
In conclusion, enterprise responsive testing helps confirm that applications work correctly on different devices and screen sizes. It helps deliver a consistent experience for users across smartphones, tablets, and desktops. Manual testing allows testers to check usability and functionality by interacting with applications on real devices. Automated testing speeds up the process by running tests on multiple devices at the same time.
Testing on physical devices, real device clouds, emulators, and simulators provides different ways to verify application behavior. Cross-device testing comes with challenges like managing a large number of devices and handling differences in operating systems.
Following best practices like testing on real devices, running tests under different network conditions, and automating repetitive tasks helps improve accuracy. Using testing tools helps teams check applications more efficiently. A well-planned approach to testing helps improve application quality and user experience.
XPath is a language used to find and select elements in XML and HTML documents. It helps developers and testers extract data, automate tasks, and interact with web elements. XPath is widely used in web development, data processing, or using automation testing tools for test automation. Well-structured XPath queries improve test execution speed, reduce maintenance efforts, and make debugging easier.
This article explores advanced XPath techniques, best practices, and how to write efficient queries for automation and data extraction.
Overview of XPath
XPath stands for XML Path Language. It’s used to navigate through elements and attributes in an XML document. XPath expressions help in locating nodes based on various criteria like tag names, attribute values, or hierarchical structure. It was defined by the World Wide Web Consortium (W3C) in 1999 and is commonly used in XML parsing, XSLT, and test automation tools like Selenium.
Following is an overview of how XPath functions and its application in web development and testing:
- Node Selection: Uses a path-like syntax to select nodes (elements) within an HTML document.
- Node Relationships: Can traverse the document tree using relationships like parent, child, ancestor, and descendant.
- Attribute Selection: Selects nodes based on their attributes and attribute values.
- Positional Selection: Selects nodes based on their position within the document tree.
- Conditional Selection: Supports functions, operators, and conditions to select nodes based on criteria.
By using XPath, developers can create precise and efficient queries that improve the reliability and speed of web applications.
There are two types of XPaths:
- Absolute XPath: Absolute XPath begins with the root element of the HTML/XML document and follows a specific path through all of the necessary elements to reach the desired element. It starts with a forward slash (/), indicating that the path starts at the root. While Absolute XPath is precise, it is not normally advised since changes to web elements, such as adding or removing elements, can cause the XPath to fail.
- Relative XPath: Relative XPath, on the other hand, begins with a double forward slash //, allowing it to search for elements wherever on the page. This type of XPath is widely used since it does not require a full path from the root node, making it more adaptive to changes in document structure. Relative XPath navigates the DOM more effectively and is less likely to fail when the web page’s structure changes. This adaptability makes it a more viable option for web scraping and automated testing.
Importance of Writing Effective XPath Queries
Writing efficient XPath queries is essential as web applications become more complex. Well-structured queries improve automation workflows and ensure reliable test execution.
Below are key reasons why writing effective XPath queries is important:
- Performance: XPath queries are widely used in automated testing and web scraping. Well-optimized queries execute faster, reducing the time needed for test runs and data extraction. This is especially useful for applications with large and complex DOM structures.
- Maintainability: Web applications frequently undergo updates, and poorly structured XPath queries can make test scripts difficult to maintain. Queries that are simple and well-organized make it easier to update automation scripts when needed. This saves time for testers and developers, reducing the effort required to modify test cases after webpage updates.
- Scalability: As web applications grow, their DOM structures become more complex. Scalable XPath queries allow test scripts to handle large and evolving web pages without slowing down execution. Well-optimized queries support long-term automation goals, helping teams keep up with expanding applications without rewriting entire test suites.
Writing effective XPath queries helps improve script performance, accuracy, and readability. Efficient queries reduce resource consumption, speed up test execution, and make debugging easier. A well-structured XPath makes automation scripts more stable and easier to maintain, even as the web application changes over time. This is especially important when dealing with dynamic content or frequently updated UI elements.
Advantages of Using XPath Locators
The following are some of the key advantages of XPath:
- XPath allows movement both forward and backward in the DOM. Elements can be located by traversing from parent to child and vice versa, making it more versatile than other locators.
- XPath does not require navigation to start from the root. It can find elements at any position within the document, making it useful for dynamic web pages where structures may change.
- XPath provides different ways to find elements in an HTML document. It can locate elements using attributes, content, or structural relationships. Parent-child relationships in the DOM can also be used to identify elements when unique attributes are not available.
To execute XPath-based automation scripts more efficiently, testers can use platforms like LambdaTest. As an AI-powered test orchestration and execution platform, LambdaTest allows users to run both manual and automated tests at scale across 5000+ real devices, browsers, and operating system combinations.
While supports automation frameworks like Selenium that rely on XPath for locating elements. This enables testers to run their XPath-based test scripts in diverse environments without the need to configure or maintain multiple local setups.
For modern web testing, frameworks like Playwright and Cypress are also widely used—though it’s worth noting that Playwright offers stronger support for XPath selectors compared to Cypress, which primarily encourages using CSS selectors.
Check out this blog to know the difference between Playwright vs Cypress.
Disadvantages of Using XPath Locators
Here are the disadvantages of XPath
- XPath requires traversing the DOM structure, which can be slower than CSS selectors. This can increase the execution time of automation scripts, especially on complex web pages.
- Modern web technologies like shadow DOM prevent XPath from accessing certain nested elements. This makes it difficult to interact with components hidden within shadow roots.
- Absolute XPath, which relies on fixed paths and indices, can break when the DOM structure changes. Even small updates, such as adding or removing elements, can cause XPath locators to fail.
- Deeply nested and complex XPath expressions can be difficult to understand. Long queries may require comments to explain their purpose, making maintenance harder over time.
- XPath expressions that use explicit node numbers or indices are tied to the current DOM structure. When the UI changes, updating these locators becomes time-consuming and increases maintenance efforts.
Due to performance concerns, limitations with shadow DOM, and maintenance challenges, XPath may not always be the best choice for locating elements. In many cases, using CSS selectors or other locator strategies can provide better stability and efficiency.
How to Write XPath in Selenium?
Below are common ways to write XPath expressions in Selenium:
● By Element Attributes
XPath can locate elements based on attributes like id, name, class, or custom attributes.
Example:
| //input[@id=’name’] |
This selects an <input> element with the id attribute set to “name.”
● By Element Text
Elements can be identified using their text content or partial text matches.
Example:
| //a[text()=’Sign Up’] |
This selects an <a> (link) element that contains the exact text “Sign Up.”
● By Element Position
XPath can locate elements based on their position in a list of similar elements.
Example:
| //ul/li[2] |
This selects the second <li> element inside an unordered list <ul>.
● By Combining Conditions
Multiple conditions can be combined to refine the selection criteria.
Example:
| //input[@type=’text’ and @id=’name’] |
This selects an <input> element where type=”text” and id=”name”.
● By Using Functions
XPath functions like starts-with(), contains(), and normalize-space() help create flexible expressions.
Example:
| //a[starts-with(@href, ‘https://’)] |
This selects all <a> elements where the href attribute starts with “https://”.
Writing efficient XPath expressions helps improve test reliability and adaptability in automation scripts.
What Is Chained XPath in Selenium?
Chained XPath in Selenium is a technique that combines multiple XPath expressions to locate an element with greater accuracy. This method refines the search process by using the double slash (//) to concatenate multiple XPath expressions, helping testers identify elements within complex or dynamic web structures.
Using Chained XPath in Selenium offers several key benefits:
- Higher Accuracy in Element Selection
- Chained XPath reduces the risk of selecting the wrong element by providing a more refined search.
- This improves test reliability by minimizing false-positive or false-negative results.
- Better Test Stability
- Combining multiple conditions makes XPath expressions less vulnerable to DOM changes.
- Even if new elements are added or existing ones are moved, the automation script remains stable.
Improved Readability and Maintainability
-
- Breaking down XPath into smaller expressions makes the code easier to understand.
- Chained XPath provides clear logic, making it simpler to debug and update test scripts.
Example of Chained XPath in Selenium
Below is a Python example demonstrating how to use Chained XPath in Selenium:
| from selenium import webdriver from selenium.webdriver.common.by import By driver = webdriver.Chrome() driver.get(“https://www.example.com”) element = driver.find_element(By.XPATH, “//div[@class=’container’]//p[@class=’text’]”) element.click() text = element.text print(text) driver.quit() |
Let’s break this down:
- Importing Required Modules:
- webdriver is imported from Selenium to launch the browser.
- By is used to locate elements using XPath.
- Launching the WebDriver:
- Chrome() initializes a new Chrome browser session.
- Ensure that the Selenium ChromeDriver is installed and accessible in the system’s PATH.
- Navigating to the Webpage:
- get(“https://www.example.com”) loads the test webpage.
- Replace “https://www.example.com” with the actual URL you are testing.
- Locating an Element Using Chained XPath:
- //div[@class=’container’]//p[@class=’text’]
- //div[@class=’container’]: Finds a <div> element with the class “container”.
- Performing Actions on the Element:
- click() simulates a click event.
- text retrieves the text content of the element.
- print(text) outputs the retrieved text to the console.
- Closing the Browser:
- quit() terminates the WebDriver session, freeing system resources.
How Do You Write XPath for Different Types of HTML Tags and Attributes?
When creating XPath expressions for different HTML tags and attributes, you can combine tag names and attribute values to accurately identify elements within the DOM structure.
XPath for id attribute:
| //*[@id=’btnK’] |
This XPath selects any element with an id attribute set to ‘btnK’. The asterisk (*) signifies any element, while @id refers to the id attribute.
XPath for button element with a specific class value:
| //button[@class=’search’] |
This XPath selects all <button> elements where the class attribute is set to ‘search’.
XPath for an image element with a specific src attribute:
| //img[@src=’/images/logo.png’] |
This XPath selects all <img> elements with a src attribute equal to ‘/images/logo.png’.
XPath expressions can be created by combining tag names with attribute values. You can also apply conditions or functions to refine the XPath for more specificity or flexibility. For example, to select all <a> elements that contain the text “Click Here” and have an href attribute that starts with “https://”, you can use:
| //a[contains(text(), ‘Click Here’) and starts-with(@href, ‘https://’)] |
This XPath uses the contains() function to check for partial text content and the starts-with() function to confirm if the href attribute begins with ‘https://’.
Knowing how to write XPath for various HTML tags and attributes helps in accurately locating and interacting with web elements during automated testing or web scraping using tools like Selenium WebDriver.
Best Practices for Writing Efficient XPath Queries
Writing efficient XPath queries helps improve test stability and performance. Below are some key guidelines to follow:
- Use Short and Descriptive Paths: Choose the shortest path that accurately identifies the target element. Long and complex XPath expressions are harder to read and more likely to break if the webpage structure changes.
- Use Attributes for Precision: Attributes like id, class, and name are often unique within a document. Using these attributes makes XPath queries more reliable and specific.
- Limit the Use of //: The // operator searches the entire document, which can slow down execution. Whenever possible, use direct paths to narrow the search scope.
- Avoid Over-Specification: Overly precise queries may fail if the document structure changes slightly. XPath should be specific enough to locate elements but flexible enough to adapt to minor updates.
Conclusion
Using XPath correctly helps in writing better automation scripts. Well-structured XPath queries make automation testing faster and reduce errors. They help testers find the right elements without facing issues due to small changes in the webpage. When XPath expressions are simple and clear, they are easier to update when web pages are modified. This makes test maintenance less time-consuming.
Although XPath is useful, it has some drawbacks. It can be slower compared to CSS selectors because it scans the entire document. Some modern web technologies prevent XPath from accessing certain elements. If the webpage structure changes, some XPath queries may stop working. This happens more often with absolute XPath, which follows a fixed path. Writing XPath expressions that are flexible reduces the chances of failure.
By understanding the strengths and weaknesses of XPath, developers, and testers can create better automation scripts. Writing simple and flexible XPath expressions helps in making automation faster and more accurate. It also helps in reducing test failures caused by minor webpage changes.
-

 BLOG2 months ago
Slothokiturbo.net: Exploring the World of Online Gaming and Community
-

 BLOG4 months ago
Literoticatags: Exploring the World of Erotica and Its Online Community
-

 BLOG4 months ago
Erothtos: Understanding Its Role in Today’s World 2025
-

 BLOG3 months ago
Use 1.5f8-p1uzt – A Comprehensive Guide!
-

 TECH4 months ago
Mansrufer: Pioneering Progress in Technology
-

 BLOG4 months ago
Watchmenontheall Calvin: An Exploration of Themes, Characters, and Significance
-

 TECH4 months ago
EggFinder TX Rev C5: A Comprehensive Review and Guide
-

 FASHION3 months ago
Achieve the Perfect Beard with Black Male Beard Products